Of late I have been working with WDS and WAIK a lot for a customers projects one this I found is there are a lot of conflicting views about how to make this work, lots of half way house instructions and ideas that I just couldn't get to work so I have decided to detail how I did get it all to work
Some Parts are very easy and we will start with the very easy part.
I am going to assume you are doing this on Windows 2003 server as there is not a huge coverage out there of windows server 2008 as of yet, however everything I describe here is pretty much the same as Windows Server 2008 except about Service packs also Windows Server 2008 has some additional features I will talk about at a later date
So the very first thing you need to is ensure the server you intent to use for you WDS has Service Pack 2 Installed, This has some enhancements for Vista installations. It can only been use within domains and not workgroups. you must have a DNS and a DHCP Server and the location where you wish to store the images must be NTFS. For most people thinking of using this system this will not be a problem at all
Next go to control Panel and Add or Remove Programs, Click on Click on Add/Remove Windows Components, Scroll to the bottom of the list and select Windows Deployment Services click install, It might ask you for your install disk depending on how your server has been configured
close all the open windows and go to Administrative Tools and you will now have two new options to choose from: Windows Deployment Service and Windows Deployment Service Legacy
Click on Windows Deployment Service and a new screen will open in MMC
First thing you need to do is run thought the configuration process.
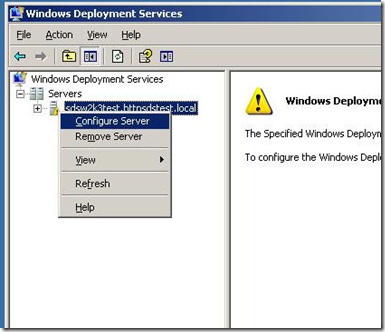
Right Click on the Server Name and select Configure Server.
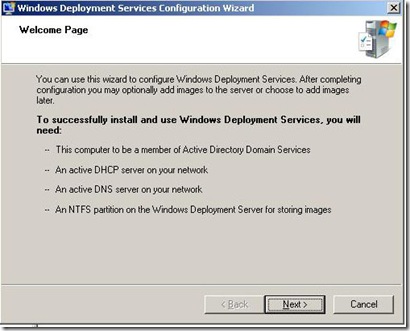
This start the configuration wizard click next to continue
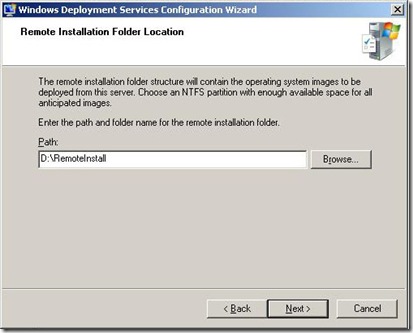
Next you need to decide where to store the images, I would recommend that the partition should have at least 50GB Free on it
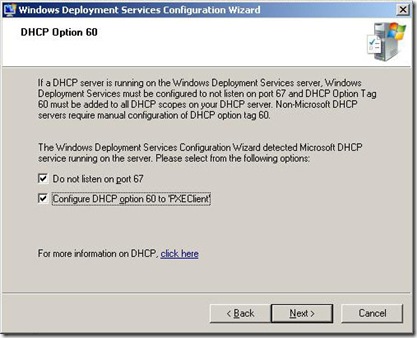
Select the options that are correct for your setup i.e. if the server WDS is installed on is a DHCP Server then tick the Do not listen on port 67, if you have a none Microsoft DHCP Server you will have to configure server option 60 yourself on the DHCP Server however as I suspect most of you will be using the Microsoft DHCP Server then make sure the configure DHCP Option 60 to PXE Client is selected and this will save you a manual job afterward. Simply put if DHCP Option 60 is not set the network card on your workstation will not be able to find the PXE server to boot from (i.e. WDS).
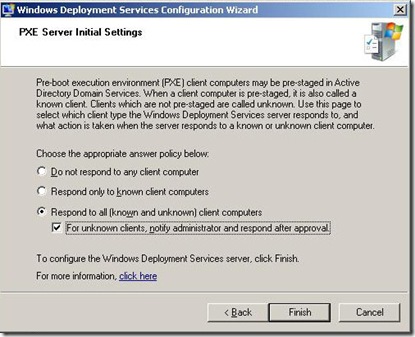
Next you need to select how the server is going to respond to client requests. now if this is the first time you have used WDS it will not be aware of any of your clients so my recommendation is that you select respond to all (Known and unknown) Client Computers. Now of course this is a security and licensing risk so I would also recommend you tick the for unknown clients notify the administrator and respond after approval, this stops just any one connecting to your WDS server via PXE and stealing your image including any software you have in your image. If you are going to perform a big roll out you can always un-tick this option when you do the big roll out and then re select it, once a machine has received an image from the server once you will not need to authorize it again.
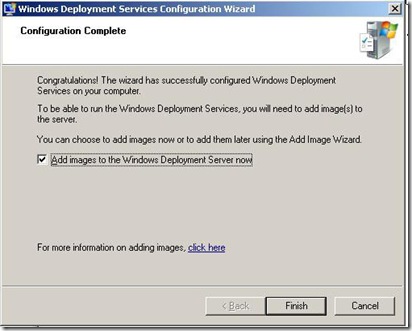
you are now asked if you want to add images right away, personally i would advise you to un-tick this before clicking finished as there is other things to be considered first and the chances are you will not have an image ready to add straight away.
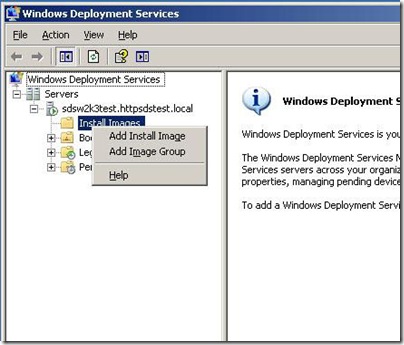
Next you want to add an Image group, right click on Install Images and select Add Image Group
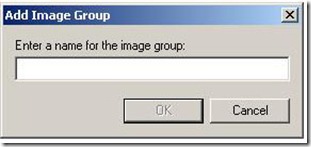
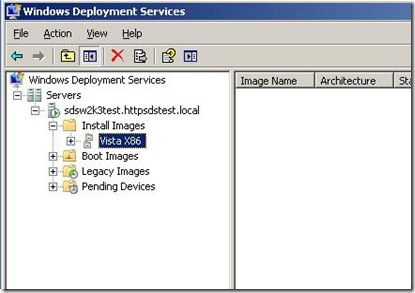
Select a name for your image group, I normally create image groups by Operating system so Vista X86 would be an example of a name for an image group
So you end up with something like this, so Now you have a WDS Server installed and configured and now all you need to do is add the different images, In part 2 we will talk about adding boot images both for deployment and for Image Capture

No comments:
Post a Comment