ok so below I have detailed how I create a reference PC, some of these setting will depend on how you want the image to work and what you want in the image. but feel free to copy my setup if you wish
creating a reference machine
1. Ensure the Bios is set to booting initially from PXE boot and secondly from CD / DVD in the bios
2. Boot From Vista Installation CD
3. Select Time and Currency to UK English, Note this will also change the Keyboard to United Kingdom (if your in the UK that is)
4. Click next
5. Click the Install Now Button
6. Enter The Product key but ensure that the Automatically Active Windows when online is un ticked
7. Click Next
8. Click the Accept Licence Agreement and click next
9. Click the Custom(Advanced Option)
10. If no partition exists create one min of 80GB, if one exists format it so it’s a clean install
11. Click next
12. The files will be copied and will begin to expand (this will take a little time depending on the machine)
13. The PC will then Restart in windows mode
14. Follow the windows setup process
15. Create a user (I always use WksAdmin)
16. Enter a secure password (make sure it is documented securely)
17. Press next
18. Give the PC A name I normal go for a image style name
19. Press next
20. Select Use Recommend setting on the help protect windows screen
21. Make sure the Date and Time as well as the Time zone are correct
22. Click next
23. Select work as the computers current location
24. Press Start
25. Login as the created user
26. Set the correct screen resolution
27. Go to control panel
28. Go to classic view
29. Go to user Account
30. Select Turn User Account Control on or off
31. Press continue when asked
32. Un-tick Use User Account Control (UAC) to help protect your computer depends on your views on this tool personally i find it a pain so i take it out
33. Click ok
34. And click to restart machine
35. Press the start button and right click on computer and select properties
36. In the computer name domain and workgroup setting click change setting
37. Click change on the computer name tab
38. Select domain and enter the domain name
39. Click ok and enter the credentials for the Domain Admin Account, then press ok
40. Click ok on the welcome to domain message
41. Click ok on the restart your computer message
42. Click Close on the System Properties page
43. Click Restart now
44. At login screen select switch users
45. Click other users
46. Login in as the domain workstation admin account
Steps 47 to 53 only if you want office to be part of the image, my initial plan was to have office installed via Group Policy however after much digging i discovered the version supplied with the Microsoft Partnership Pack (MAPS) is a retail version of office and Group Policy can't be used to roll out retail versions of software, so i decided my best bet was to create a share on the network for my app's and install it into the image from there thus giving it a standard path it can go back to if it needs to run a repair or install a component
47. Browse to the application store
48. Run office setup
49. Select EULA and click next, select customize
50. Set the common items to install and everything else to install at first uses (for list of common items see App 1
51. Click install now
52. Install any other app's required for the image (recommend this is done from network unless the image is for remote users then best to copy the install files to the PC and then install)
53. Do Not Install Anti Virus Software as part of an Image!
54. Install any updated drivers for the image
55. Restart machine
56. Login in as domain workstation admin account
57. On the control panel welcome screen un tick the show at start up box at the bottom and close
58. Install any windows updates
59. Set to check for more than just windows updates
60. Run C:\windows\system32\sysprep\sysprep.exe
61. Select OOBE and Generalize option
62. Reboot
63. Press F12 for network boot
64. Select Capture boot image
65. When the capture image screen comes up select the Volume to capture (generally C:\)
66. Give the image a good descriptive name
67. Give a full description of the image including what is installed
68. Click next
69. Press browse next to the name and location select Computer then C: and make a directory called Image go into that directory and give the image a file name (as descriptive as possible)
70. Tick the Upload Image to WDS Server
71. Enter the Host name of the WDS server or the IP address and click connect
72. You will be prompted for credentials enter your domain admin user name and password
73. Then in image group select the group where you would like the image stored i.e. vista x86 etc
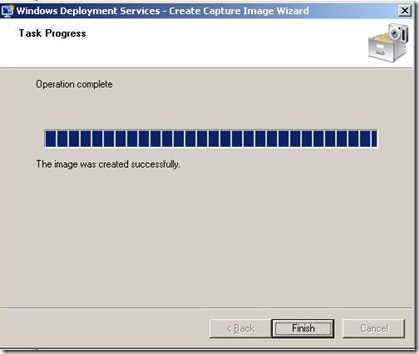
74. Then click finish
Now that's pretty easy stuff lets talk about PXE for a moment, PXE is a network boot protocol, but you must be aware that not all network cards support it and some need an additional boot ROM to be able to use it. Personally these days I have have made one network card my standard as it is well support and has PXE built in its the Intel PRO 1000 GT Desktop, they cost about £20 each and in my view excellent cards to use. a lot of motherboard come with a network card onboard these days and most seem to support PXE, you might find however that the Vista boot Image doesn't have a driver for them as standard as happened with me with the Attansic L1 Network card on one of my machines, you can inject drivers into the boot image and we will be covering that in part 4. its not a difficult thing to do but its not overly reliable. if you want to save yourself a lot of hassle get a Intel Pro 1000 GT card.
so how can you find out if your card is PXE enabled well I normally visit the manufacture web site and it should be listed in the extend specification, Sometime it is referred to as the boot agent so be aware of that. if it is a built in network card check your bios there is normally a setting like Enable PXE or Enable Boot Agent sometimes Boot from network
for more information on the PXE Standard Why not visit the wikipedia.
Installing your newly create image
ok so you have your image on the server, so on a PC if you boot using PXE (F12) and select the deployment Image the machine will boot into a windows setup environment,
you will need to go to the WDS Console if this is the first time you have installed from WDS to this machine and look in pending devices, here you will see your machine listed, if you right click on it and say Approve Device, the PXE system will then load on the PC
first select your language settings
you will then be asked for a User name and Password that has access to the RemoteInstall area on the network, use an Administrator account for this
now select the image you wish to install, for example the one we have just created.
next select the drive you wish to install on to (if the machine already has an OS on it I would advise you format the drive
now it will appear like it is running a normal windows installation but of course from the network.
once the installation has complete it will reboot and you will be presented with the windows Quick Setting up screen
First will ask you
select the Country or Region, Time and Currency and the keyboard layout
for me this is all UK setting but you need to use the setting that are right for you
next you will be asked for the Software Key and if you wish to Automatically active windows when online, My suggestion is you don't automatically activate windows until you 100% sure the images are perfect and this might take a few attempts and a few tweaks.
Next you have to accept the EULA (End Users Licences Agreement)
Now you have to create a local user as an admin, anything will do here as I recommend you delete it when you have completed the installation.
Give the computer a name well again depends on your naming convention for computers, some people like to use the user name - PC personally I tend to go for HTTPSDS-WKS- and then a number incrementally
Next you are asked to select the help protect Windows option, personally here I just go for the recommended as I uses WSUS so the setting are over written.
Now you have to set you time zone and make sure the time and date are correct.
you also need to set what network it is on Home / Work or Public location
Click start and log in an either the user you created on the initial image creation in my case Wksadmin or as the user you just created with the quick start wizard
you can then add the machine to the domain and you have a full working machine if you have added office to the image you will need to authorize it again but other than that it will be a fully working install
but isn't that a lot of work after dropping down an image, would it not be better if most of the setting was automated, of course it would and we will look at that in part 4 Unattended.xml and we will also look at how to inject a driver into the boot image.