Part 4 of WAIK will come soon just been a little mental here of late so not time for longish blogs,
if you have any questions on it thou email me :)
Part 4 of WAIK will come soon just been a little mental here of late so not time for longish blogs,
if you have any questions on it thou email me :)
here is a quick gotcha
i am migrating my system from windows 2003 to 2008 and as the main system is exchange I decided to start with that one, after all File and print is easy and my test web server will stay the same as my remote live web server on windows 2003 (anyway that's not in the domain)
all was going ok (i will not say well because i had two attempts at installing exchange) I had disabled IP V6 because i wasn't planning to use it just yet and then i noticed that SA was not Automatically starting and also that the new server that was a DC and GC was not being seen by exchange as a GC. After a little research I found this article
http://msmvps.com/blogs/ehlo/archive/2008/06/12/1634433.aspx
it seems that if you don't have IP v6 enabled you have all sorts of silly no related strange problems like GC not being seen and SA not starting
so you have been warned IP v6 keep it enabled !
ok so below I have detailed how I create a reference PC, some of these setting will depend on how you want the image to work and what you want in the image. but feel free to copy my setup if you wish
1. Ensure the Bios is set to booting initially from PXE boot and secondly from CD / DVD in the bios
2. Boot From Vista Installation CD
3. Select Time and Currency to UK English, Note this will also change the Keyboard to United Kingdom (if your in the UK that is)
4. Click next
5. Click the Install Now Button
6. Enter The Product key but ensure that the Automatically Active Windows when online is un ticked
7. Click Next
8. Click the Accept Licence Agreement and click next
9. Click the Custom(Advanced Option)
10. If no partition exists create one min of 80GB, if one exists format it so it’s a clean install
11. Click next
12. The files will be copied and will begin to expand (this will take a little time depending on the machine)
13. The PC will then Restart in windows mode
14. Follow the windows setup process
15. Create a user (I always use WksAdmin)
16. Enter a secure password (make sure it is documented securely)
17. Press next
18. Give the PC A name I normal go for a image style name
19. Press next
20. Select Use Recommend setting on the help protect windows screen
21. Make sure the Date and Time as well as the Time zone are correct
22. Click next
23. Select work as the computers current location
24. Press Start
25. Login as the created user
26. Set the correct screen resolution
27. Go to control panel
28. Go to classic view
29. Go to user Account
30. Select Turn User Account Control on or off
31. Press continue when asked
32. Un-tick Use User Account Control (UAC) to help protect your computer depends on your views on this tool personally i find it a pain so i take it out
33. Click ok
34. And click to restart machine
35. Press the start button and right click on computer and select properties
36. In the computer name domain and workgroup setting click change setting
37. Click change on the computer name tab
38. Select domain and enter the domain name
39. Click ok and enter the credentials for the Domain Admin Account, then press ok
40. Click ok on the welcome to domain message
41. Click ok on the restart your computer message
42. Click Close on the System Properties page
43. Click Restart now
44. At login screen select switch users
45. Click other users
46. Login in as the domain workstation admin account
Steps 47 to 53 only if you want office to be part of the image, my initial plan was to have office installed via Group Policy however after much digging i discovered the version supplied with the Microsoft Partnership Pack (MAPS) is a retail version of office and Group Policy can't be used to roll out retail versions of software, so i decided my best bet was to create a share on the network for my app's and install it into the image from there thus giving it a standard path it can go back to if it needs to run a repair or install a component
47. Browse to the application store
48. Run office setup
49. Select EULA and click next, select customize
50. Set the common items to install and everything else to install at first uses (for list of common items see App 1
51. Click install now
52. Install any other app's required for the image (recommend this is done from network unless the image is for remote users then best to copy the install files to the PC and then install)
53. Do Not Install Anti Virus Software as part of an Image!
54. Install any updated drivers for the image
55. Restart machine
56. Login in as domain workstation admin account
57. On the control panel welcome screen un tick the show at start up box at the bottom and close
58. Install any windows updates
59. Set to check for more than just windows updates
60. Run C:\windows\system32\sysprep\sysprep.exe
61. Select OOBE and Generalize option
62. Reboot
63. Press F12 for network boot
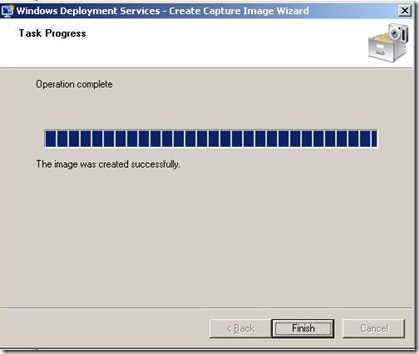
64. Select Capture boot image
65. When the capture image screen comes up select the Volume to capture (generally C:\)
66. Give the image a good descriptive name
67. Give a full description of the image including what is installed
68. Click next
69. Press browse next to the name and location select Computer then C: and make a directory called Image go into that directory and give the image a file name (as descriptive as possible)
70. Tick the Upload Image to WDS Server
71. Enter the Host name of the WDS server or the IP address and click connect
72. You will be prompted for credentials enter your domain admin user name and password
73. Then in image group select the group where you would like the image stored i.e. vista x86 etc
74. Then click finish
Now that's pretty easy stuff lets talk about PXE for a moment, PXE is a network boot protocol, but you must be aware that not all network cards support it and some need an additional boot ROM to be able to use it. Personally these days I have have made one network card my standard as it is well support and has PXE built in its the Intel PRO 1000 GT Desktop, they cost about £20 each and in my view excellent cards to use. a lot of motherboard come with a network card onboard these days and most seem to support PXE, you might find however that the Vista boot Image doesn't have a driver for them as standard as happened with me with the Attansic L1 Network card on one of my machines, you can inject drivers into the boot image and we will be covering that in part 4. its not a difficult thing to do but its not overly reliable. if you want to save yourself a lot of hassle get a Intel Pro 1000 GT card.
so how can you find out if your card is PXE enabled well I normally visit the manufacture web site and it should be listed in the extend specification, Sometime it is referred to as the boot agent so be aware of that. if it is a built in network card check your bios there is normally a setting like Enable PXE or Enable Boot Agent sometimes Boot from network
for more information on the PXE Standard Why not visit the wikipedia.
ok so you have your image on the server, so on a PC if you boot using PXE (F12) and select the deployment Image the machine will boot into a windows setup environment,
you will need to go to the WDS Console if this is the first time you have installed from WDS to this machine and look in pending devices, here you will see your machine listed, if you right click on it and say Approve Device, the PXE system will then load on the PC
first select your language settings
you will then be asked for a User name and Password that has access to the RemoteInstall area on the network, use an Administrator account for this
now select the image you wish to install, for example the one we have just created.
next select the drive you wish to install on to (if the machine already has an OS on it I would advise you format the drive
now it will appear like it is running a normal windows installation but of course from the network.
once the installation has complete it will reboot and you will be presented with the windows Quick Setting up screen
First will ask you
select the Country or Region, Time and Currency and the keyboard layout
for me this is all UK setting but you need to use the setting that are right for you
next you will be asked for the Software Key and if you wish to Automatically active windows when online, My suggestion is you don't automatically activate windows until you 100% sure the images are perfect and this might take a few attempts and a few tweaks.
Next you have to accept the EULA (End Users Licences Agreement)
Now you have to create a local user as an admin, anything will do here as I recommend you delete it when you have completed the installation.
Give the computer a name well again depends on your naming convention for computers, some people like to use the user name - PC personally I tend to go for HTTPSDS-WKS- and then a number incrementally
Next you are asked to select the help protect Windows option, personally here I just go for the recommended as I uses WSUS so the setting are over written.
Now you have to set you time zone and make sure the time and date are correct.
you also need to set what network it is on Home / Work or Public location
Click start and log in an either the user you created on the initial image creation in my case Wksadmin or as the user you just created with the quick start wizard
you can then add the machine to the domain and you have a full working machine if you have added office to the image you will need to authorize it again but other than that it will be a fully working install
but isn't that a lot of work after dropping down an image, would it not be better if most of the setting was automated, of course it would and we will look at that in part 4 Unattended.xml and we will also look at how to inject a driver into the boot image.
Ok so someone post on a forum asking a question, hey we are all in the same boat here things change fast and we are all up against a learning curve. personally posting on a forum is my last ditch hope after reading all the documentation and reading all the forum reply's relating to my issue. but if I do post on a forum and then I resolve it I post what I did to resolve it and where I found the answer in the end.
the most universally useless reply is when someone posts an issue then they resolve it themselves and post oh found the answer cheers or whatever, but never explain how they resolved it. to me this is totally selfish and self centred behaviour. they expects someone else to give them knowledge for free but they are not willing to share what they know with others.
so come on people if you find a solution to a problem you have been having(even if it is doh typo alert or something as silly as that) and you have asked people for help share what you have learnt because you damn well expect people to do the same for you !!
Now days if I see a poster that does that I make a note of his ID and if he posts another question and I know the answer I will not reply. that's right people you get on to my shit list and I tell you you stay there! I am more than happy to share my knowledge with anyone that's willing to share their knowledge with me
Ok so in part one we setup a Windows Deployment Server. Now in part two we are going to add the boot images.
first of all you need a Vista Install CD with Service Pack 1 DVD. It has to be Service pack one built in or this will not work, for this example I used Vista Business with SP1 DVD
At the server insert the DVD and go to the WDS Console

Right click on boot images and select add boot image

Browse to the DVD and to the sources directory and select the boot.wim file

The Console reads the built in Metadata and puts it in to two text boxes so that you can change it so you know just what to use the boot image for, for example this one i want to use for booting X86 Image for Vista

This is a Image to deploy Vista x86 images so that's what I have called the image and given a full image description, so in this case I have expanded on the Image name.

Check the settings on the confirmation screen before clicking next

After the image has been imported you will be asked to click finish at this point you have a PXE Bootable Image,

so this is what you end up with a Vista Deployment X86 image listed as online and available for PXE networked machines to boot from.
Now that's great we can boot a PC but without any images to install its pretty pointless so we need to be able to capture an image and transfer it to the WDS Server. for this we need to create another Boot image with the Capture tools built in.

Right click on the boot image that we have just created and select Create Capture Boot Image.

First we need to give the Image a new name so we can distinguish between the two boot images. I have changed Deployment to Capture and the same in the description, next you need to browse to where the images are kept for me as I set the Install Directory to D:\RemoteInstall the full path is D:\RemoteInstall\Boot\x86\Images. Then I gave the new image a file name of Capture.wim. Don't make the initial mistake I made and think that location and file name is of the image you want to use as the source, its not clear but this is the path and the location of where you want the new boot image to be and be called.
Once the image has finished importing then you will end up with this screen click finish and then click out of boot images Right click on the server and select refresh and then click back on to boot images, seems to be a little bug where the boot image section doesn't refresh after creating a capture image.

Once it has refreshed you will be reward with this screen showing that you have two boot images, one for deploying an image and one for capturing an image. In part 3 we will go through the creating a reference PC, Sysprep and capture of image, we will also discuss PXE a little more and how to find out if a network card supports PXE
Of late I have been working with WDS and WAIK a lot for a customers projects one this I found is there are a lot of conflicting views about how to make this work, lots of half way house instructions and ideas that I just couldn't get to work so I have decided to detail how I did get it all to work
Some Parts are very easy and we will start with the very easy part.
I am going to assume you are doing this on Windows 2003 server as there is not a huge coverage out there of windows server 2008 as of yet, however everything I describe here is pretty much the same as Windows Server 2008 except about Service packs also Windows Server 2008 has some additional features I will talk about at a later date
So the very first thing you need to is ensure the server you intent to use for you WDS has Service Pack 2 Installed, This has some enhancements for Vista installations. It can only been use within domains and not workgroups. you must have a DNS and a DHCP Server and the location where you wish to store the images must be NTFS. For most people thinking of using this system this will not be a problem at all
Next go to control Panel and Add or Remove Programs, Click on Click on Add/Remove Windows Components, Scroll to the bottom of the list and select Windows Deployment Services click install, It might ask you for your install disk depending on how your server has been configured
close all the open windows and go to Administrative Tools and you will now have two new options to choose from: Windows Deployment Service and Windows Deployment Service Legacy
Click on Windows Deployment Service and a new screen will open in MMC
First thing you need to do is run thought the configuration process.

Right Click on the Server Name and select Configure Server.

This start the configuration wizard click next to continue

Next you need to decide where to store the images, I would recommend that the partition should have at least 50GB Free on it

Select the options that are correct for your setup i.e. if the server WDS is installed on is a DHCP Server then tick the Do not listen on port 67, if you have a none Microsoft DHCP Server you will have to configure server option 60 yourself on the DHCP Server however as I suspect most of you will be using the Microsoft DHCP Server then make sure the configure DHCP Option 60 to PXE Client is selected and this will save you a manual job afterward. Simply put if DHCP Option 60 is not set the network card on your workstation will not be able to find the PXE server to boot from (i.e. WDS).

Next you need to select how the server is going to respond to client requests. now if this is the first time you have used WDS it will not be aware of any of your clients so my recommendation is that you select respond to all (Known and unknown) Client Computers. Now of course this is a security and licensing risk so I would also recommend you tick the for unknown clients notify the administrator and respond after approval, this stops just any one connecting to your WDS server via PXE and stealing your image including any software you have in your image. If you are going to perform a big roll out you can always un-tick this option when you do the big roll out and then re select it, once a machine has received an image from the server once you will not need to authorize it again.

you are now asked if you want to add images right away, personally i would advise you to un-tick this before clicking finished as there is other things to be considered first and the chances are you will not have an image ready to add straight away.

Next you want to add an Image group, right click on Install Images and select Add Image Group

Select a name for your image group, I normally create image groups by Operating system so Vista X86 would be an example of a name for an image group

So you end up with something like this, so Now you have a WDS Server installed and configured and now all you need to do is add the different images, In part 2 we will talk about adding boot images both for deployment and for Image Capture
My god nearly a years gap between posting. Life got a bit crazy for a while but I seem to be getting on top of it all now.
I have now started my own business offering Support, Development and Administration Services to small companies and for the last year I have been mostly working on that
my first major project that is now in phase 2 was Putney Arts Theatre new web site. Phase 1 was the public site, This is a site designed so that all the content can be updated by the users without using a single HTML Editor WYSIWYG or otherwise. all the editing is done online, This is my preferred solution for people for two reason
1. For the customer, they don't have to pay someone with development skills to change some text
2. If all I did all the time was change the text for people in the web sites I would be bored out of my brain, I love a challenge and ok sometimes we have to do the every day stuff but hey if its not a technical issue why is a techie doing it !!
anyway phase 2 is an area for the arts theatres members to keep in touch with each other and throw around ideas so that phase of the project starts in the next week or so, over the next few weeks I also hope to be bring you up to date with the research I have been doing and there is lots of it so stay tuned
I am feeling pretty energized at the moment to get a lot of stuff documented god knows why maybe it was the thrill rides at Thorpe park yesterday blew the cobwebs out of my head and now I am ready to rumble and grumble about all things IT Related

